


DONOFF iot light dimmer
Placed onCompile and Upload the firmware to the ESP-01
First you need to download the firmware source code from github to your local computer. Launch a terminal/command window and navigate to the directory where all your Arduino projects reside.$ cdNow create a folder called “DONOFF”
$ mkdir DONOFFand cd to this folder
$ cd DONOFFNow go to the DONOFF github page and click the green button.

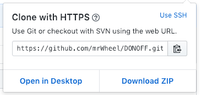
Copy the URL ( https://github.com/mrWheel/DONOFF.git ) to the clipboard.
Then launch a terminal/command window and enter:
Now start the Arduino IDE and open the DONOFF sketch. Note that the sketch contains some tabs that contain specific parts of the code.
Before compiling and uploading the firmware to the ESP-01, make sure you have selected the correct board with the correct options!!
Then launch a terminal/command window and enter:
$ git clone https://github.com/mrWheel/DONOFF.git .Don't forget to put a “.” at the end of the command. (dot) to place.
Now start the Arduino IDE and open the DONOFF sketch. Note that the sketch contains some tabs that contain specific parts of the code.
Before compiling and uploading the firmware to the ESP-01, make sure you have selected the correct board with the correct options!!
** ** DONOFF: Generic ESP8266 Flash Size 1M (128KB SPIFFS) ** LED_BUILTIN pin 1 ** PWM out pin 3 ** ** NODEMCU: Flash Size 4M (1MB SPIFFS) ** LED_BUILTIN pin 16 (D0) ** PWM out (any pin available) ** ** SONOFF : Generic ESP8266 Flash Size 1M (128KB SPIFFS) ** LED_BUILTIN pin 13 ** PWM out pin 12 (not actualy PWM but only On/Off) ** ** Arduino -IDE settings for ESP-01 (black): ** ** - Board: "Generic ESP8266 Module" ** - Flash mode: "DOUT" ** - Flash size: "1M (128K SPIFFS)" ** - Debug port: "Disabled " ** - Debug Level: "None" ** - IwIP Variant: "v2 Lower Memory" ** - Reset Method: "nodemcu" // but will depend on the programmer! ** - Crystal Frequency: "26MHz" ** - VTables: "Flash" ** - Flash Frequency: "40MHz" ** - CPU Frequency: "80MHz" ** - Buildin Led: "1" // "1 " for ESP-01, ”16” for NodeMCU, “13” for SONOFF ** - Upload Speed: "115200" ** - Erase Flash: "Only Sketch" ** - Port: "DONOFF at <-- IP address - ->" **
Upload the data map to the ESP-01
After you have compiled and uploaded the firmware to the ESP8266, you must also upload the files in the data folder to the ESP8266.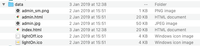
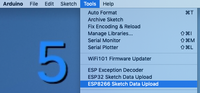
After installing the ESP8266 Sketch Data Uploader (URL), simply click on this tool to start uploading. Note: if you have the Serial-Monitor window open, you will receive an error message. You have to close the Serial-Monitor window first!
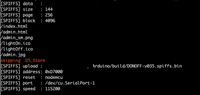
Depending on the ESP8266 you are using, uploading the data to SPIFFS takes a few seconds (ESP-01 SPIFFS 128KB) to a few minutes (NODEMCU SPIFFS 1MB).
You are now ready to plug the ESP-01 into the DONOFF hardware and start using the light dimmer!