3D Clock
Placed onGlue segments
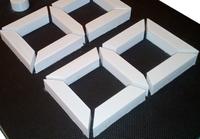
Now that all the separate parts are ready, it's time to glue everything together. I used a bit of super glue. To get everything in line, it is useful if you make some lines around the digits in advance, for example with painter's tape. This way you will know where the segments should go when you are gluing everything.
At the dots in the middle where no pcb was glued yet, I first glued the printed circuit boards to the board, and then glued the caps over them.
 Everything glued
 Make and glue IO shield
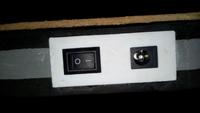
For the IO panel along the side, a hole must be drilled into the recesses for the cables, and about 1 cm must also be milled in so that the switch and the DC jack fit neatly. Wires must also be attached to the DC jack and the switch, these must reach all the way to the controller circuit board. I have taken a length of about 20 cm for this.
Now you can glue the DC jack into the 3D-printed casing, and glue it into the frame of the clock as well.
 IO shield glued


