Build weather station
Placed onAPI key
An API key is required to obtain weather information. For this you need to register an account with OpenWeatherMap, which can be done here: https://home.openweathermap.org/users/sign_up. After you are registered, go to the "API keys" section. Copy the API key you find there (See photos).
An API key is required to obtain weather information. For this you need to register an account with OpenWeatherMap, which can be done here: https://home.openweathermap.org/users/sign_up. After you are registered, go to the "API keys" section. Copy the API key you find there (See photos).
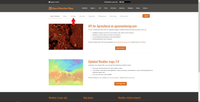 Go to "API keys"
 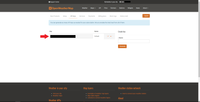 Copy the API key
 Install the ArduinoJson library
If you already have the latest version of the ArduinoJson library, you can skip this step.
Open the Arduino IDE, go to Sketch > Include library > Manage libraries (see photo). Search for "arduinojson" and install the latest version of Benoit Blanchon's ArduinoJson library (see photo).
If you already have the latest version of the ArduinoJson library, you can skip this step.
Open the Arduino IDE, go to Sketch > Include library > Manage libraries (see photo). Search for "arduinojson" and install the latest version of Benoit Blanchon's ArduinoJson library (see photo).
 Open the library manager
 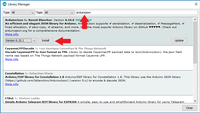 Download the ArduinoJson library
 Install the LiquidCrystal I2C library
First, download the library ZIP file by going to this link: https://github.com/johnrickman/LiquidCrystal_I2C/archive/master.zip.
Then go to Sketch -> Include Library -> Add .ZIP library in the Arduino IDE and select the ZIP file of the library.
First, download the library ZIP file by going to this link: https://github.com/johnrickman/LiquidCrystal_I2C/archive/master.zip.
Then go to Sketch -> Include Library -> Add .ZIP library in the Arduino IDE and select the ZIP file of the library.
 Add the ZIP file
 Install the ESP8266 boards
If you have already added the ESP8266 boards to the Arduino IDE, you can skip this step.
Open the Arduino IDE settings by going to File > Preferences. In the "Additional Boards Manager URLs" text box, enter the URL "http://arduino.esp8266.com/stable/package_esp8266com_index.json" (see photo). Then open the Board Manager with Tools > Board > Boards Manager (see photo). Then install the ESP8266 boards (see photo).
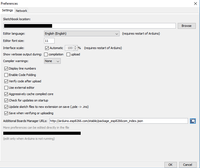 Change the "Additional Boards Manager URLs"
  Open the Board Manager
 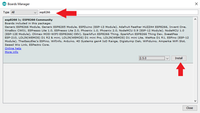 Install the ESP8266 boards
 Find out I2C address
Before uploading the weather station code, you need to find the address of the I2C LCD module. To do this, use the code below.
Before uploading the weather station code, you need to find the address of the I2C LCD module. To do this, use the code below.
I2C scanner code
 In this case the address is 0x3F
 Upload code
Make sure you have selected the correct board under Tools -> Board and that you have selected the correct port under Tools -> Port.
Enter your information and upload the following code to the Wemos via the Arduino IDE:
Make sure you have selected the correct board under Tools -> Board and that you have selected the correct port under Tools -> Port.
Enter your information and upload the following code to the Wemos via the Arduino IDE:


