


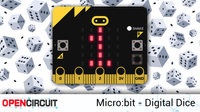
Programming with Micro:bit : Create your own digital dice
Placed onWant to learn how to make your own digital dice using a Micro:bit ? Good news! It is not only possible, but also surprisingly easy. In this blog post, we'll go through the process step-by-step, so you'll have your very own interactive dice at the end.
What is a Micro:bit ?
Before we begin, let's briefly discuss what a Micro:bit actually is. A Micro:bit is a small programmable computer system designed to teach children (and adults!) how to code. It has various functions such as an LED matrix, buttons, motion sensors, and can be easily programmed using the web-based programming environment.
 Parts of a Micro:bit
 What's really nice about the Micro:bit is that you can do so many things with it. It is not just limited to making a digital dice as we show in this blog. You can program the Micro:bit to make music, control robots, play games, do science experiments and much more. You can also connect the Micro:bit to other devices and sensors to come up with even more interesting projects.
The best thing about the Micro:bit is that it's an open invitation to learn and explore. You can play with it while also gaining important skills in programming and troubleshooting. It's a great resource for anyone interested in technology, coding, or just wanting to learn something new!
All parts of a Micro:bit Supplies
Ready to make your digital dice with a Micro:bit ? Grab your Micro:bit , the tiny, powerful brain of this whole adventure. And then of course you need a USB cable, the indispensable lifeline that connects your Micro:bit and computer. But wait a minute, did we forget something? Oh yes, a computer with internet access! But since you're reading this now, I think you've already got the hang of that last point. On the right track!
Step 1: Go to the MakeCode editor
Ready for step 1? We enter the wonderful world of the MakeCode editor. This is where our Micro:bit comes to life and where we tell it what to do. It's like a starship's command center, but on your computer screen.
You may be wondering, how do I get to this magical place? Well, it's easier than you think. You just need to navigate to makecode.microbit.org by clicking this link. Yes, it really is! No secret passwords or complicated protocols. Connect your Micro:bit to the computer, click on the link and voila, you're there!
Now that you're in the MakeCode editor, you're ready to program the Micro:bit and bring your digital dice to life!
Step 2: Start a new project
Click on 'New Project' and give it a name, for example "Digital Dice". Now you're ready to start programming!
 Makecode new project
 Step 3: Programming the Dice
And now we are preparing for the most fun step of this adventure: programming our digital dice! Don't worry, it's not rocket science or anything complicated. It's kind of like playing with virtual Lego blocks.
That's right, you just need to grab the right blocks and drag them into the right place in our MakeCode editor. It's like solving a puzzle, but instead of a picture you get a fully working digital dice!
Shake it
Now it's time for action! In the MakeCode editor, look for the "Input" tab. Click on it and you will see a number of options. We're looking for the "Shake" block. That's the star of the show in this step. Grab that "Shake" block and drag it onto your playing field.
But be careful! You'll see a few other blocks hanging around there: "forever" and "onstart". They may seem interesting, but don't be distracted. We don't need them for this project. So, just ignore them and focus on our "Shake" block.
That's it, you're there! You are officially programming with the Micro:bit !
 Micro:bit likes to shake it
 Turn on the LED panel
Now we want to put the "show number" block into action. Go to the “Basic” tab, where you can find the "show number" block waiting to step into the spotlight.
Grab the "show number" block and drag it right in the middle of your "shake" block. Like the perfectly fitting piece of a puzzle.
 Show a number on the LED display
 Add some math
After dragging the "show number" block into our "shake" block, we're going to add a little bit of math. So, go to the "Math" tab and find the "pick random" block. Take this block and place it in the "show number" block.
Now, we want our dice to work like a real dice, right? So we change the numbers in the "pick random" block to 1 and 6. But you know what the great thing about a digital dice is? You can change it to whatever you want! So feel free to use other numbers if you want. It's your dice, so you make the rules!
 Choose a number between 1 and 6
 Step 4 Test your code
Well, look at that! We've coded our dice and now it's time to see it in action. But how do we do that, you may ask? It's actually as easy as anything we've done so far.
On the left side of the MakeCode editor you can see a small simulation of the Micro:bit . This is our own personal test zone, a virtual Micro:bit where we can try out our code. Click the "shake" button and see what happens. If all went well, you should see a random number between 1 and 6 - or whatever you chose - appear.
But that is not everything! We can also send our code to the real Micro:bit . Connect your Micro:bit to your computer via the USB cable. Then click the "Download" button in the MakeCode editor to send the code to your Micro:bit . And voila, you've just programmed your very own digital dice!
Now every time you shake your Micro:bit it will show a new number, just like a real dice. So go ahead, shake it and see what number comes up. Have fun with your new digital dice!
 Test your program
 Extra Functions for Your Digital Dice
Once you're comfortable programming your digital dice, why not try adding some extra features? The Micro:bit has enough features to take your project to the next level.
How about adding sound effects, for example? Every time you 'roll' the dice, the Micro:bit could make a fun sound. Or maybe you want to program some sort of victory dance for when you roll a six. The LEDs on the Micro:bit can display all kinds of patterns and animations, so let your imagination run wild!
It's your project, so feel free to experiment and see what's possible. With a little imagination and some programming skills, you can turn your digital dice into something truly special!
Conclusion
You have just successfully programmed your very first digital dice using a Micro:bit . Applause to yourself, because you've made an important step in the world of coding!
But remember, this is just the beginning. With your new Micro:bit skills, a whole world of creative projects is open to you. You could try to further personalize your dice. Maybe you want to use different numbers, or maybe you want to link certain outcomes to specific animations. The possibilities are endless!
And once you're comfortable programming your Micro:bit , you can try other projects as well. From creating music to creating interactive games, the Micro:bit can do it all.
So, keep your curiosity alive, keep experimenting and keep learning. Who knows what more amazing things you can create with your Micro:bit !
Good luck on your coding journey and don't forget to have fun!