How do you build a Tesla Coil?
Placed onNow comes the easier part: building the circuit.
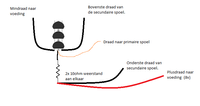
The diagram shows a power supply of 8V, but a standard adapter can also be used to power the tesla coil. This may be 12v, but then there must be a resistance between the dc plug and the breadboard in the tesla coil.
Below the diagram:
You can make the 20k ohm resistor by twisting two 10k resistors together.
 Your breadboard should now look like this:
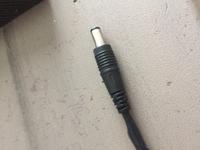
  Making the cable: You can tighten the screws in the banana plugs. If you put a stripped wire in it, it will make good contact with the plug. On the other side of the wire, solder the wires into the dc plug. That's how you made your cable.