Adafruit MacroPad RP2040 Starter Kit - 3x4 Keys + Encoder + OLED

Description Links
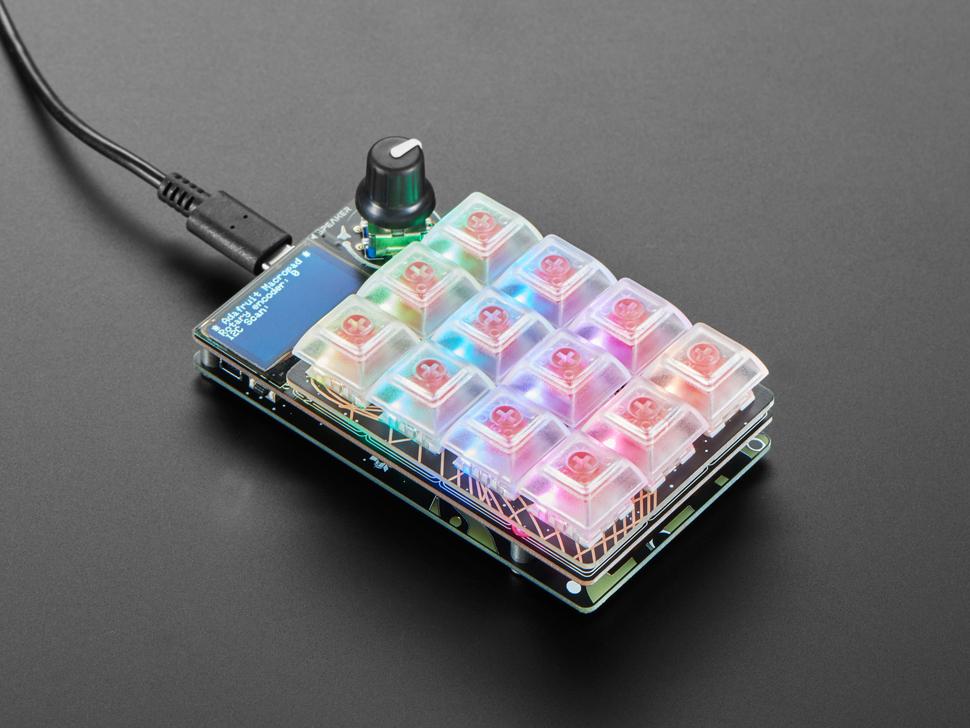
Strap yourself in, we're launching in T-minus 10 seconds...Destination? A new Class M planet called MACROPAD! M here stands for Microcontroller because this 3x4 keyboard controller features the newest technology from the Raspberry Pi sector: say hello to the RP2040. It's a speedy little microcontroller with lots of GPIO pins and 64 times more RAM than the Apollo Guidance Computer.
We added 8 MB of flash memory for plenty of storage. This is the full MacroPad starter kit with included keys, key caps and enclosure! Many folks in the mechanical keyboard community like to customize the keys and keycaps of their keebs - if you want to customize it, you may want to get the individual pieces.
Starter Pack Includes:
- Adafruit MacroPad RP2040 - 3x4 Keys + Encoder + OLED
- Kailh Mechanical Key Switches - Linear Red
- Clear Keycaps for MX Compatible Switches
- Adafruit MacroPad enclosure kit
- Additional components for full assembly
Get ready to upgrade your desk's mission control station with a CircuitPython or Arduino powered Macropad - complete with 12 buttons, OLED display, speaker and rotary encoder. Customize it for your spacecraft to help guide you through the great reaches of the unknown. (Or just have it type out your favorite emojis.)
Each of the 12 sockets can accept a Cherry MX-compatible key switch. No soldering required, just snap the keys in! This space-ship is also fitted with a 128x64 monochrome OLED for a crisp heads-up display that can be used in Arduino or CircuitPython to display keymaps, stats, computer performance, etc.
There's also a rotary encoder with push-button soldered in. Twist and turn it or push to change volume or monitor brightness or scroll: whatever you like! A tiny speaker can give audio feedback or play fun bleepy tunes.
Want to add more hardware? No worries - a STEMMA QT port on the side lets you connect any I2C add-on peripherals from the massive STEMMA QT / Qwiic family of plug-in boards. Dress up your Adafruit Macropad with PaintYourDragon's fabulous decorative silkscreen enclosure and hardware kit.
You get the two custom PCBs that are cut to act as a protective bottom plate and a mechanically-stabilizing keyboard plate. Use the included M3 screws to attach the bottom plate - it's symmetric so you can decide which side you'd like to have visible. Stick the rubber feet on the bottom to protect your desk from scratches.
Fit the 12 keys you'd like to install into the keyplate, they'll snap in solidly and let you plug in all the keys at once. Finally, fit the D-shaft knob onto the encoder. Lookin' good and ready to keeb!
Properties
| Brand | Adafruit |
| Model | 5128 |
ETA is not known
Customer questions
Customer Reviews
Suggested products
- In stock Adafruit White LED Backlight Module - Medium 23mm x 75mm € 3,25 View product
- In stock Adafruit Waterproof DC Power Cable Set - 5.5/2.1mm € 3,25 View product
- In stock Adafruit Breadboard-friendly SPDT Slide Switch € 1,25 View product
- In stock Adafruit Small Enclosed Piezo w/Wires € 1,25 View product
- In stock Adafruit Mini Metal Speaker w/ Wires - 8 ohm 0.5W € 2,50 View product
- In stock Adafruit JST PH 2-Pin Cable – Male Header 200mm € 1,- View product
- In stock Adafruit Small Alligator Clip to Male Jumper Wire Bundle - 6 Pieces € 6,40 View product
- In stock Adafruit NOOds - Flexible LED Filament - 3V 300mm long - Lime Green € 8,75 View product
- In stock Adafruit NOOds - Flexible LED Filament - 3V 300mm long - Warm White € 5,75 View product
- In stock Adafruit Woven Conductive Fabric - 20cm square € 6,25 View product
- In stock Adafruit Single ended nOOds - 128mm long Flexible LED Filament - Blue 3V € 5,- View product
- In stock Adafruit Micro Lipo - USB LiIon/LiPoly charger € 7,50 View product
- 5 pieces In stock Adafruit NeoPixel Diffused 5mm Through-Hole LED - 5 Pack € 6,25 View product
- In stock Adafruit Stereo Enclosed Speaker Set - 3W 4 Ohm € 9,25 View product
- In stock Adafruit NOOds - Flexible LED Filament - 3V 300mm long - Blue € 9,25 View product


