Get started with the ESP8266
Placed on Opencircuit ESP8266 ESP-01S WIFI Module The ESP8266 WiFi module was presented at its introduction as a TTL "Serial to Internet" module. Handy to connect Arduino boards to the internet. It soon turned out that this ESP-01S module and its number of GPIO pins, outwardly carried, bigger brothers (ESP-7, ESP-12, NodeMCU etc. In stock € 3,60
The ESP8266
The ESP8266 is a low cost microprocessor with Wi-Fi capability and a full TCP/IP stack. The ESP8266 has been developed and is produced by the Chinese manufacturer Espressif Systems from Shanghai. Due to the integrated WiFi option, this microprocessor has become very popular in a short time. At first because the chip was seen as a cheap option to provide an Arduino board with WiFi, but soon the real nerds (and I say nerds with the utmost respect) that the built-in microprocessor and the amount of available (flash) memory far exceeded the capacity and possibilities of the Arduino boards. Just some data at a glance- Processor: L106 32-bit RISC microprocessor core based on the Tensilica Xtensa Diamond Standard 106Micro running at 80MHz
- Memory:
- 32 KiB instruction RAM
- 32 KiB instruction cache RAM
- 80 KiB user data RAM
- 16 KiB ETS system data RAM
- External QSPI flash: up to 16 MiB is supported (512 KiB to 4 MiB typically included)
- IEEE 802.11 b/g/n Wi-Fi
- Integrated TR switch, balun, LNA, power amplifier and matching network
- WEP or WPA/WPA2 authentication, or open networks
- 16 GPIO pins
- SPI
- I²C (software implementation)
- I²S interfaces with DMA (sharing pins with GPIO)
- UART on dedicated pins, plus a transmit-only UART can be enabled on GPIO2
- 10-bit ADC (successive approximation ADC)
1) Download and install the Arduino IDE
Download and install the Arduino Integrated Development Environment (IDE) for the Operating System (OS) your DeskTop or LapTop computer (there are versions for Windows, Linux and Mac) runs on.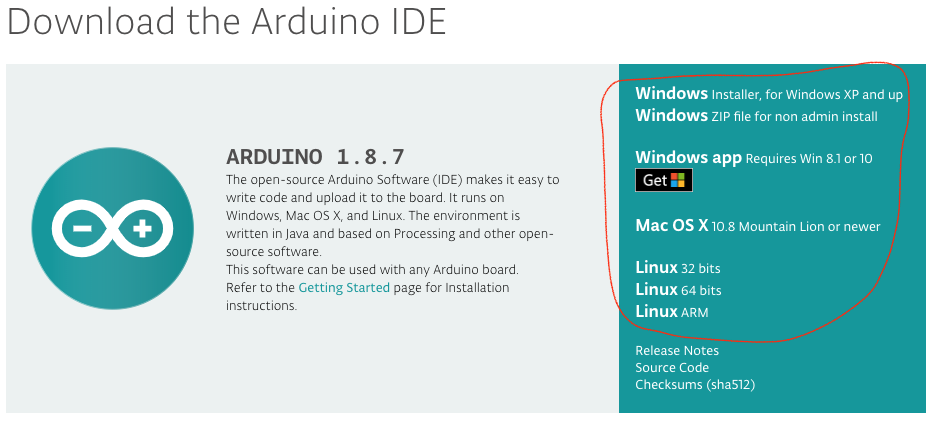 Download Arduino IDE
 After downloading you need to extract (unzip or untar) the received file and install it. That installation is different per OS, but it is clearly indicated on the Arduino website. Once installed you can immediately get started with the Arduino IDE.
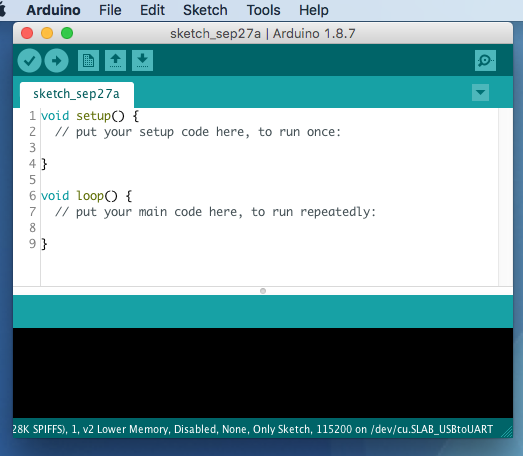 Home screen Arduino IDE
 To be able to use the IDE with the ESP8266 microprocessor, we have to perform a few more steps.
2) Install the “ Arduino core for ESP8266 WiFi chip”
In the Arduino IDE, at “Institutions” the following URL should be entered after “Additional Boards Manager URLs:” (see box outlined in red) http://arduino.esp8266.com/stable/package_esp8266com_index.jsonPlease read the explanation in it README.md file and the extended documentation!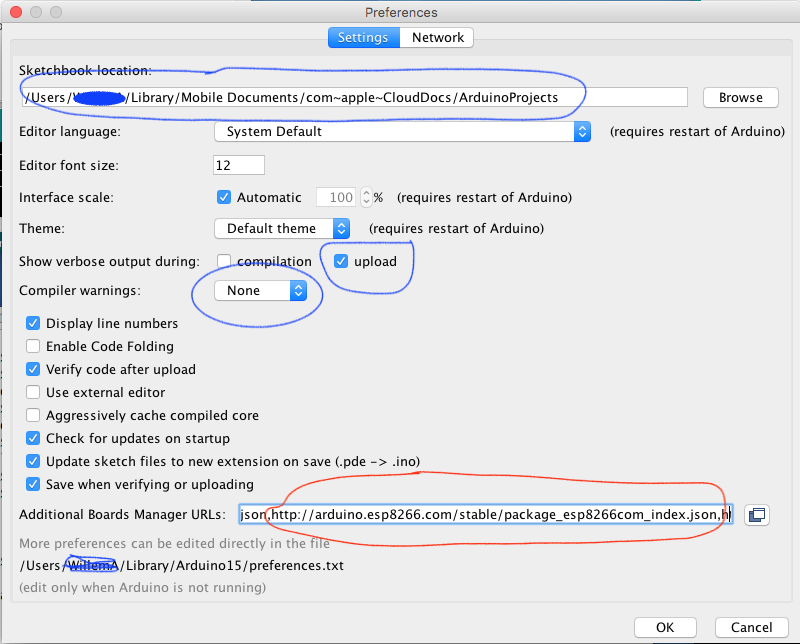 Institutions
 More additional board manager URLs can be entered. You must then put them one after the other and separate them with a comma (,). Optionally, you can also change the path where your projects are located (the Sketchbook Location) to adjust. By default, this refers to your “Documentsfolder:
C:\Users\\Documents\ Arduino \ .. and that's a great place! You can adjust the other settings as needed. Above are the settings I like. After making adjustments, click [OK]. Improvements are made to the esp8266 core fitted. You can install this via [Tools] > [Board] > [Boards Manager]. For filter enter " esp8266 ". The latest version is currently 2.4.2.3) A file system on a chip
One of the great features of the ESP8266 is that it contains flash memory. Flash memory is memory that retains its contents even without tension. Compare it to an SD card. The flash memory is, depending on the board, 512kB to 16MB(!) in size. Part of this flash memory is used to store your program. What remains can be arranged as a file system (the so-called. SPI Flash File System ‑SPIFFS‑). You can use this file system in your program not only to store (for example measurement) data, but also to store the content of, for example, a web page or a configuration file (index.html).A index.html is then of course part of your program and you develop outside the ESP8266. To use the SPI File System for these types of files, you must have a “plugin” in your Arduino Projects folder. You get the plugin here from. Go to this github page and click the green button.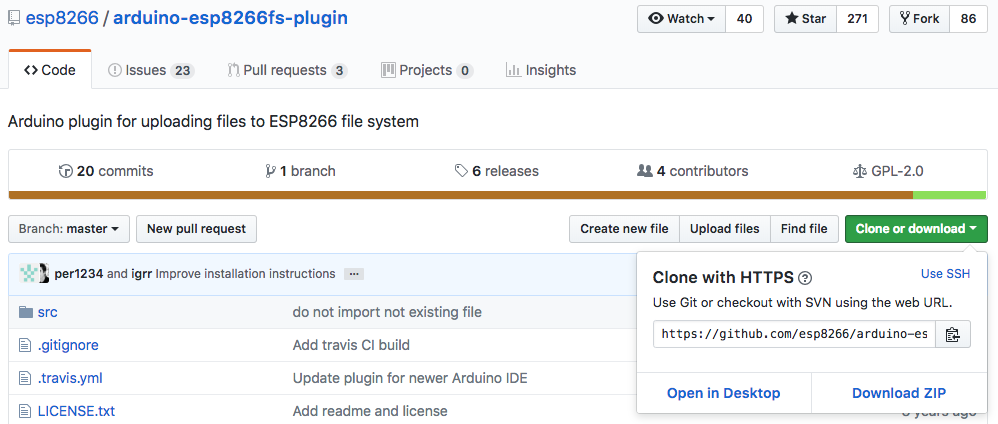 SPI Flash File System download
 Then select [Download ZIP]. Now go to your "SketchLocation” folder and create a new folder in it “
tools” on (if it does not already exist). Extract the zip file you just downloaded into this tools folder. A number of new folders will now be created where the plugin will be placed. The path looks something like this:/tools/ESP8266FS/tool/esp8266fs.jar 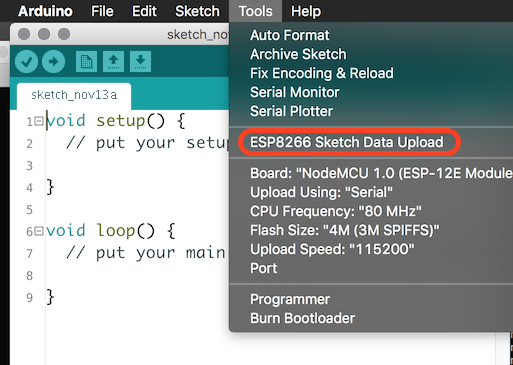 Data upload
 You can now create a new folder in the folder where your program is located called “
dates" to make. All files that you subsequently put in this folder will be marked with “ESP8266 Sketch Data Upload” can be placed on the SPIFFS file system of your ESP8266 (provided there is enough space of course). In the selection of your board, in addition to the correct type of board, you must also indicate how much space of your Flash memory you want to use for the file system (before uploading your program to the ESP8266!). Normally you would want to make this as large as possible, but if you "About The Air” want to put programs on your ESP8266 (so without a physical connection but via WiFi) then you have to take into account that you twice need the size of your program to do this. What remains can be used as a file system.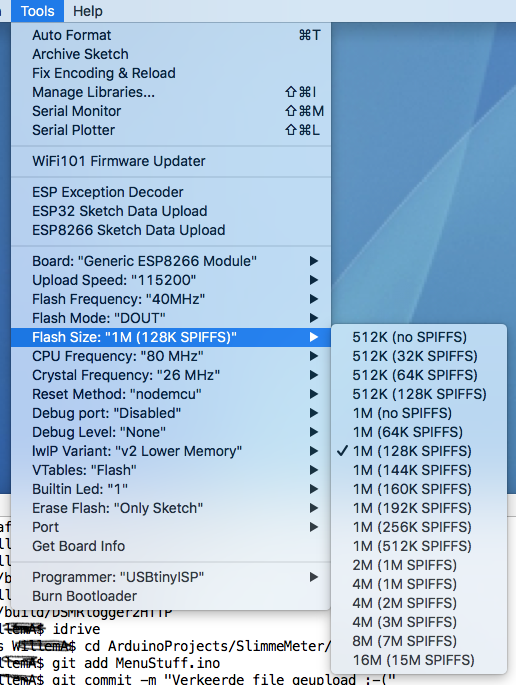 Board selection
 4) Install Additional Libraries
Now that you have an Arduino IDE that allows you to program ESP8266s (flash) you will discover that software has been developed by brilliant people that you can use to realize complex projects, without having to reinvent the wheel yourself. This software is often offered in the form of a library and you do not have to library just to use it. For example, a library to convert your ESP8266 from a telnet server (with a telnet server you can use a telnet client log in to your ESP8266 on your DeskTop or LapTop). There appear to be a number of libraries for this. Let's take as an example TelnetStream by John Drassy. After what Googling we find the software this github page. Jan Drassy is very brief with his explanation, but fortunately there is a folder with examples (well, one example). To install the library, click the green download button and select “Download ZIP”.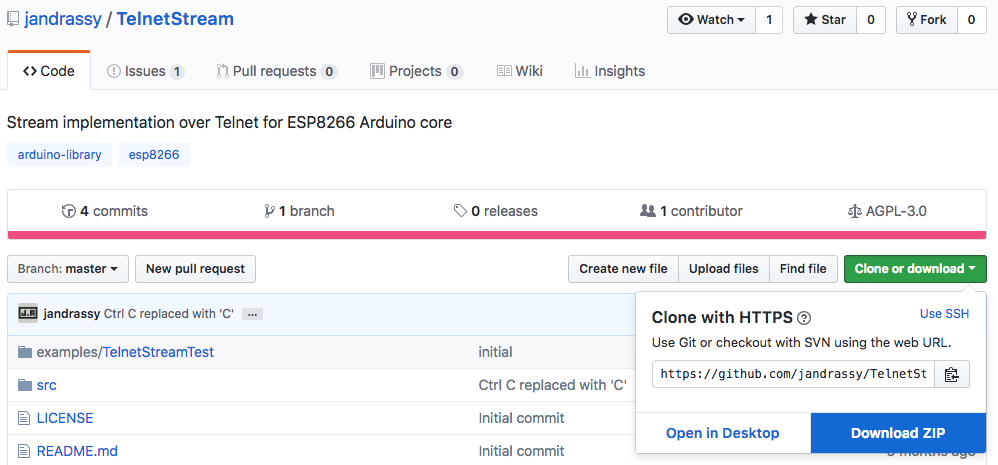 Telnet download
 Remember where you saved the zip file. Now go to the Arduino IDE and select [Sketch > Include Library > Add .ZIP Library]
 Add ZIP Library
 A selection window appears where you select the file you just downloaded.
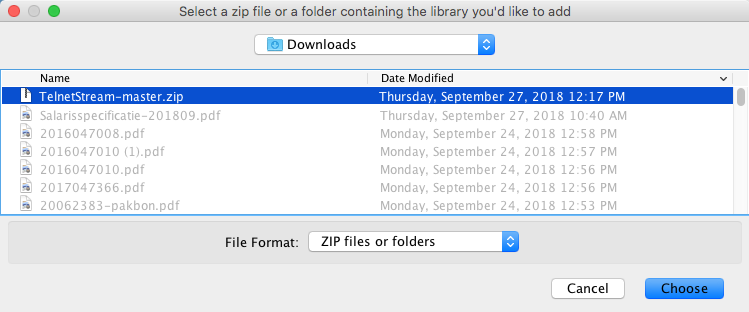 Select zip file
 The library is now installed and ready to use. Most libraries come with a number of sample programs to help you learn how to use the library.
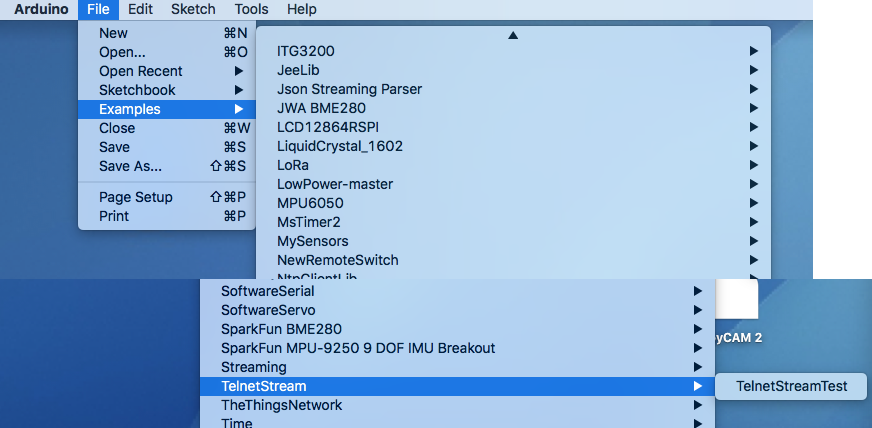 telnet example
 (sorry, the picture is a bit cropped)
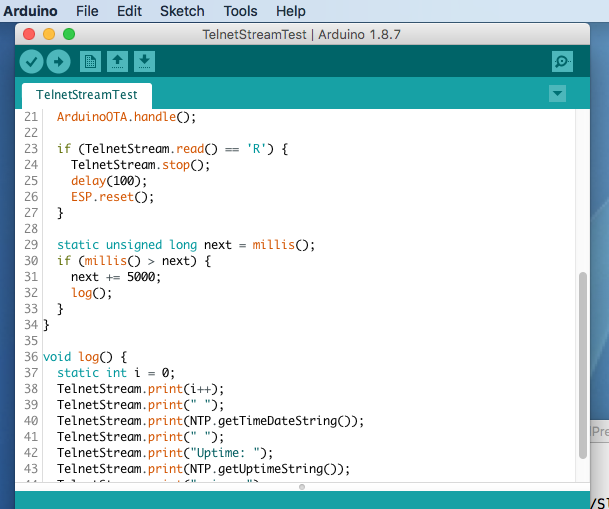 Telnet testing program


